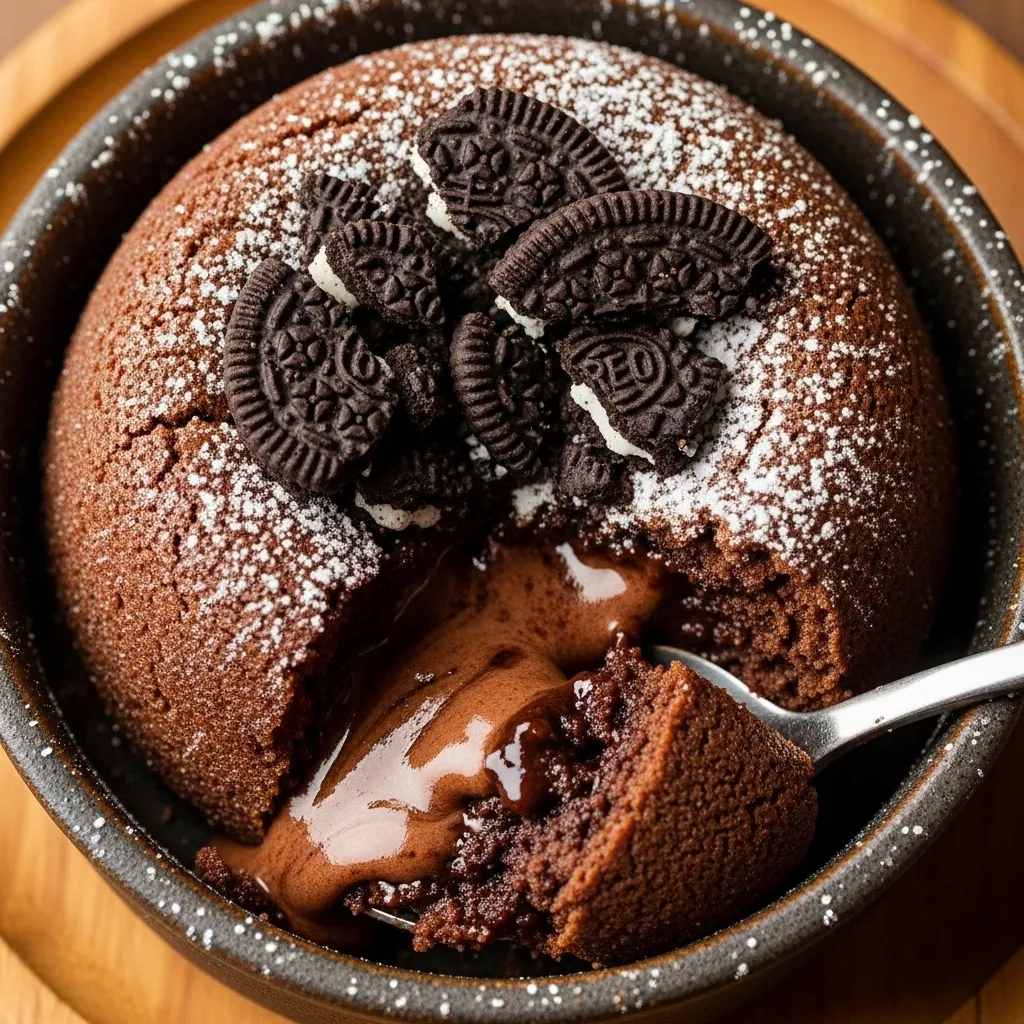
Oreo Lava Cake
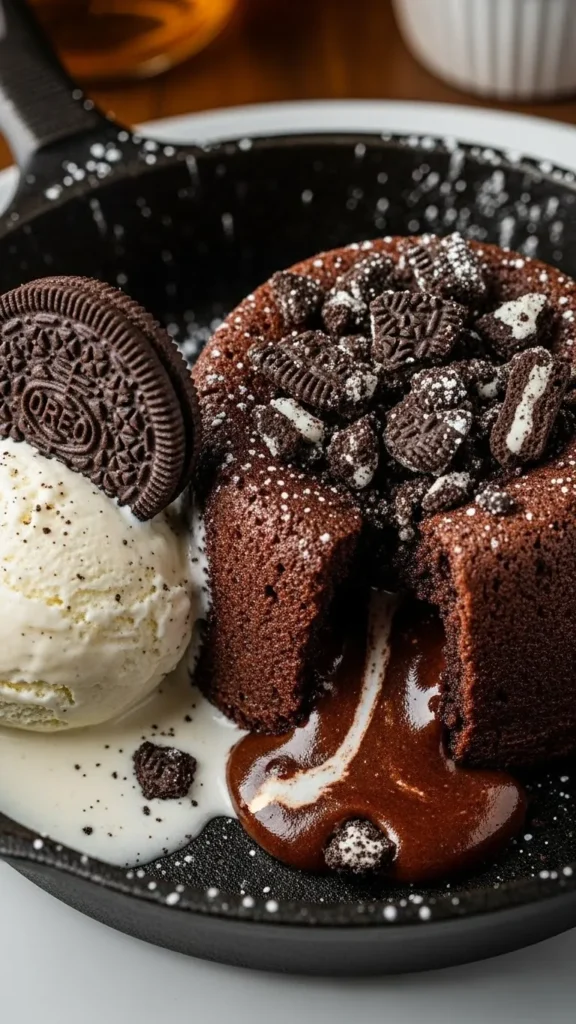
Oreo Lava Cake is the ultimate dessert for chocolate and Oreo lovers who crave that gooey, molten center. It’s rich, decadent, and surprisingly simple to make at home. With a crisp outer layer and a flowing, chocolatey Oreo center, this dessert delivers drama and indulgence in every bite. I love this dessert because it combines the best of both worlds: the familiar crunch of Oreos with the warm, gooey luxury of molten chocolate. It’s perfect for special occasions, date nights, or any time you want to treat yourself. Despite looking fancy, it’s incredibly approachable for even beginner bakers.
Why This Oreo Lava Cake Works
This cake works because of the contrast between textures. The outer layer sets like a regular cake, while the center remains molten and flowing, creating that “lava” effect. The crushed Oreos inside add crunch and depth, making each bite interesting and satisfying. It also works because it’s flexible. You can serve it straight from the oven, top it with ice cream, or drizzle with chocolate or caramel sauce. Even though it’s a rich dessert, it’s portioned perfectly for one or two servings, making it indulgent without being overwhelming.
Choosing the Right Ingredients
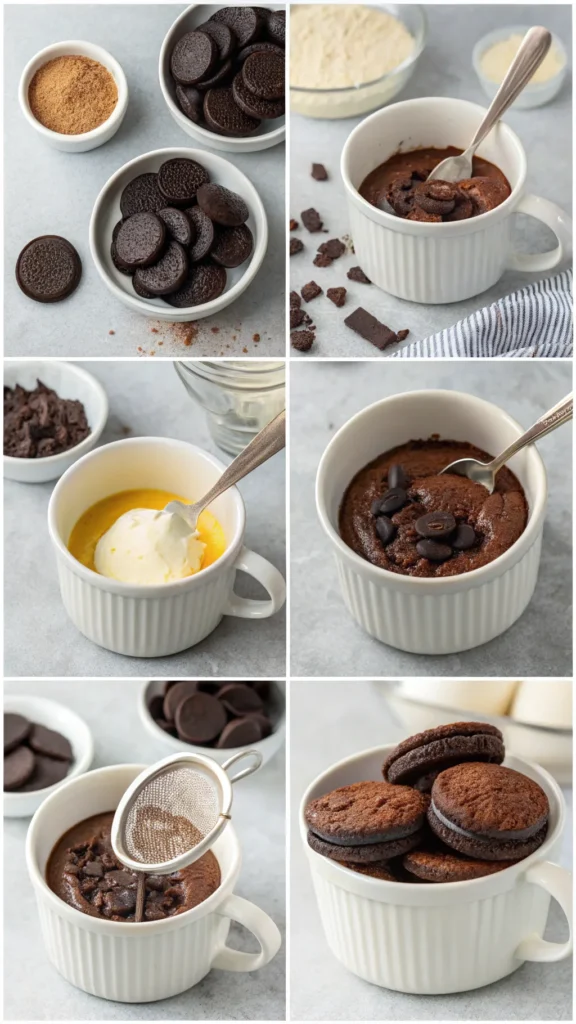
The key ingredients are simple but critical. Use crushed Oreos for the lava filling and good-quality cocoa powder or melted chocolate for the cake base. Eggs provide structure and richness, while butter adds moisture and a tender crumb. Optional add-ins like chocolate chips or a splash of espresso can enhance flavor.
Ingredients (serves 2):
- 4 Oreo cookies (for filling, can use more for extra gooeyness)
- ¼ cup unsalted butter, melted
- ¼ cup granulated sugar
- 2 large eggs
- 3 tablespoons all-purpose flour
- 2 tablespoons cocoa powder
- ½ teaspoon vanilla extract
- Pinch of salt
- Optional toppings: whipped cream, vanilla ice cream, chocolate sauce, crushed Oreos
Instructions:Making the Oreo Lava Cake
Start by preheating your oven to 350°F (175°C) and greasing your ramekins. Prepare the cake batter by mixing eggs, sugar, butter, flour, and cocoa powder until smooth. Fold in a few crushed Oreos for extra flavor and texture. Spoon half of the batter into each ramekin, then add a few whole or crushed Oreos in the center for the “lava” effect. Cover with the remaining batter and bake for 12–14 minutes. The top should be set while the center remains soft and gooey.
Texture and Flavor
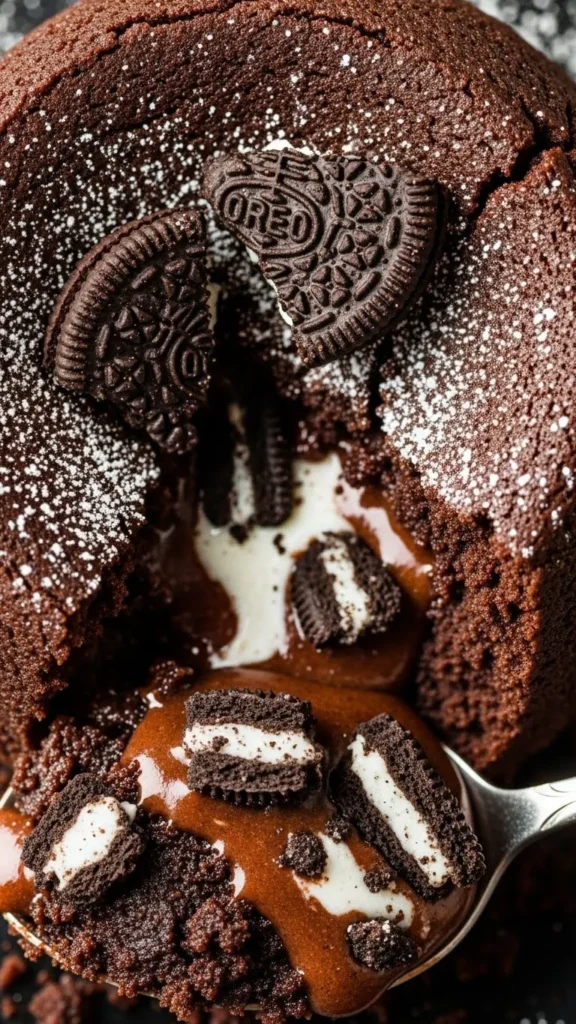
The texture of Oreo Lava Cake is crispy on the outside, soft and molten in the center, with melted Oreo chunks adding extra richness. Each bite delivers a perfect combination of crunch and creamy, chocolatey lava. Flavor-wise, it’s indulgent and comforting. The chocolate cake is rich and sweet, while the Oreos add a familiar, nostalgic taste that complements the molten center. It’s the ultimate chocolate fix for Oreo fans.
Texture and Flavor Highlights:
- Crispy outer layer
- Gooey, molten Oreo center
- Melted Oreo pieces for added richness
- Balanced sweetness and chocolate flavor
Serving Suggestions
Serve the lava cake warm, straight from the oven. Top with whipped cream, vanilla ice cream, or chocolate sauce for an extra indulgent treat. A dusting of powdered sugar or extra crushed Oreos makes it look fancy with minimal effort. It’s perfect for romantic dinners, dinner parties, or any time you want a show-stopping dessert that tastes as good as it looks.
Serving Ideas:
- Top with vanilla ice cream or whipped cream
- Drizzle chocolate or caramel sauce
- Sprinkle crushed Oreos or powdered sugar
- Serve immediately for molten center effect
Storing the Cake
Oreo Lava Cake is best enjoyed fresh and warm. Because of its molten center, it does not store well. If needed, you can refrigerate baked cakes for a day and gently reheat in the microwave, but the lava effect is best immediately after baking.
Storing Tips:
- Best served fresh and warm
- Can refrigerate and reheat, but molten center may firm
- Not ideal for long-term storage
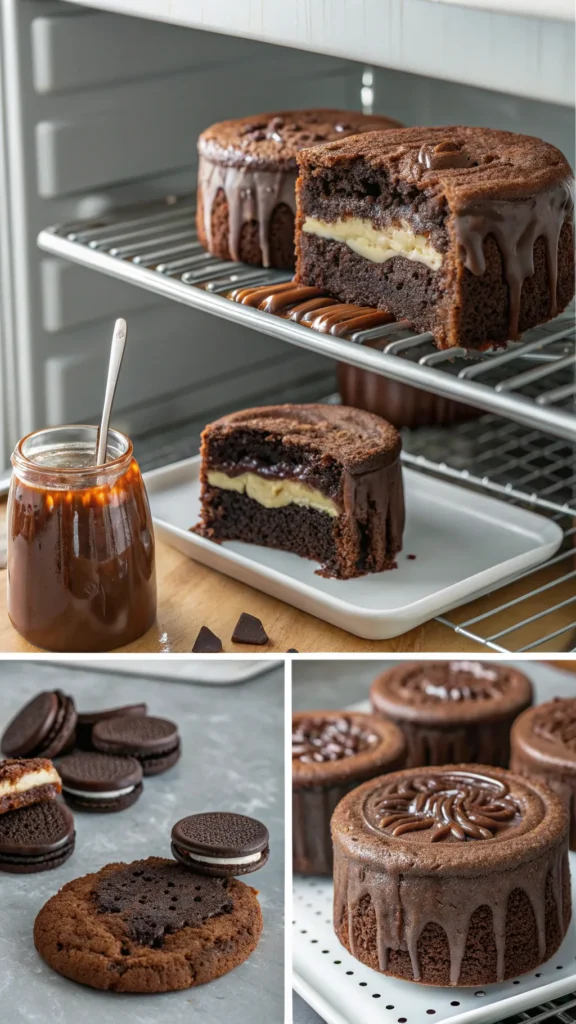
Variations to Try
Customize your lava cake by adding chocolate chips, peanut butter, or a scoop of ice cream inside the center. You can also experiment with flavored Oreos, caramel drizzle, or a sprinkle of sea salt for added depth. For a personal twist, try adding espresso powder to intensify the chocolate flavor. The lava cake is versatile and can be adapted to your favorite flavor combinations.
Why This Lava Cake Is So Comforting
Oreo Lava Cake is comforting because it combines warm chocolate and nostalgic Oreo flavors in one indulgent dessert. It’s rich, gooey, and satisfying, making every bite feel like a treat. There’s something inherently cozy about a dessert that’s molten in the center but perfectly set outside. It’s indulgent, dramatic, and irresistibly comforting, all in a single serving.
Conclusion
Oreo Lava Cake proves that even simple ingredients can create a gourmet, indulgent dessert. With a molten center, crisp edges, and rich Oreo flavor, it’s perfect for chocolate lovers and Oreo fans alike. Once you try it, you’ll see why it’s a favorite for special occasions and solo indulgence alike. Quick, easy, and absolutely decadent, this dessert is a must-try.