Chocolate Cheesecake Bars
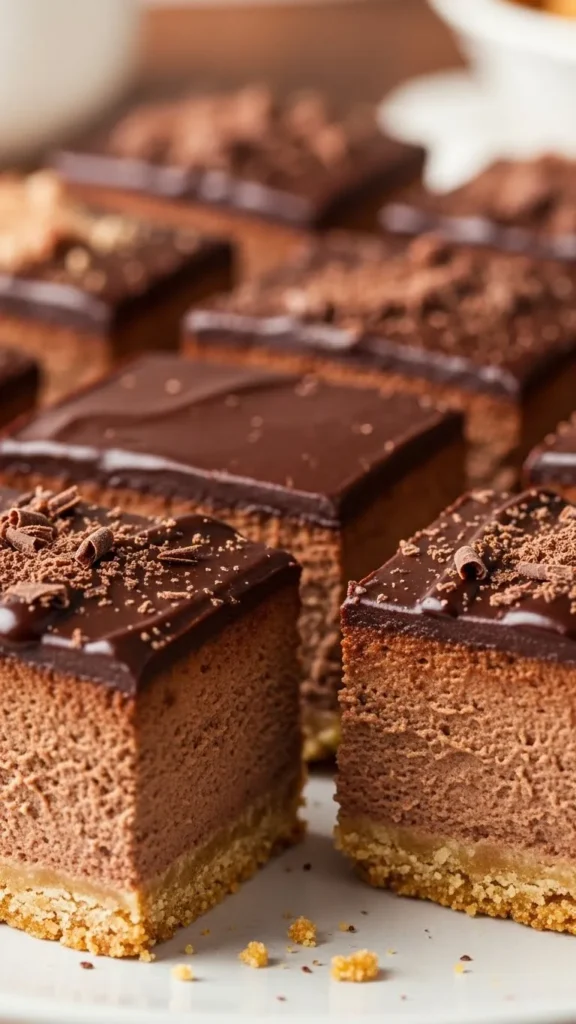
Chocolate cheesecake bars are what I make when I want cheesecake vibes without committing to a full cheesecake situation. They’re rich, chocolatey, creamy, and way easier to slice and share. Plus, let’s be honest, bars feel less intimidating than a towering cheesecake, right? I started making these because I wanted something indulgent but controlled. Individual slices keep portions reasonable, at least in theory. One bite in, though, and all bets are off.
Why Chocolate Cheesecake Bars Are Always a Hit
These bars hit that sweet spot between decadent and practical. You get the depth of chocolate and the creaminess of cheesecake in a neat little square. No cracked tops, no water baths, no stress. IMO, they’re perfect for gatherings because they travel well and look impressive without extra effort. People see “cheesecake” and immediately assume you worked harder than you did.
What Makes Them So Popular
- Rich chocolate flavor
- Creamy cheesecake texture
- Easy slicing and serving
- Make-ahead friendly
Ingredients You’ll Need

This recipe stays simple, but quality matters a lot here. Cheesecake doesn’t forgive bad ingredients. Chocolate especially shows its flaws fast.
Chocolate Crust:
- 1 ½ cups chocolate cookie crumbs (such as Oreos, finely crushed)
- ¼ cup unsalted butter, melted
Chocolate Cheesecake Filling:
- 16 ounces cream cheese, softened
- ½ cup granulated sugar
- 2 large eggs
- ½ cup sour cream
- 1 teaspoon vanilla extract
- ½ cup semi-sweet chocolate chips, melted
Optional Topping:
- Whipped cream
- Chocolate shavings or cocoa powder
Step-by-Step Instructions for Chocolate Cheesecake Bars
1. Preheat oven and prepare pan:
Preheat oven to 325°F (160°C). Line a 9×9-inch baking pan with parchment paper, leaving an overhang for easy removal.
2. Prepare the crust:
In a medium bowl, combine chocolate cookie crumbs and melted butter. Press firmly into the bottom of the prepared pan. Bake for 8–10 minutes, then let cool slightly.
3. Make the cheesecake filling:
In a large bowl, beat softened cream cheese with sugar until smooth. Add eggs one at a time, beating well after each addition. Stir in sour cream and vanilla extract until fully incorporated. Fold in melted chocolate until smooth.
4. Assemble and bake:
Pour the cheesecake filling over the cooled crust and smooth the top. Bake in the preheated oven for 35–40 minutes, or until the edges are set and the center is slightly jiggly. Avoid overbaking to maintain a creamy texture.
5. Cool and chill:
Allow the bars to cool at room temperature for 30 minutes, then refrigerate for at least 3–4 hours or overnight for best results.
6. Serve:
Lift the bars from the pan using the parchment overhang. Slice into squares and optionally garnish with whipped cream, chocolate shavings, or a dusting of cocoa powder.
Choosing the Right Chocolate
Chocolate sets the tone, so don’t grab whatever’s on sale. I usually go with dark chocolate because it balances the sweetness of the cheesecake base. Milk chocolate works, but it pushes things sweeter fast. Ever had chocolate cheesecake that tasted flat? Weak chocolate does that.
Chocolate Tips That Work
- 60–70% dark chocolate
- Unsweetened cocoa for depth
- Real chocolate bars
- Taste before using
The Crust: Simple but Crucial
The crust holds everything together, so it needs attention. I use chocolate cookie crumbs mixed with melted butter and press them firmly into the pan. A loose crust ruins clean slices. I chill or pre-bake it lightly depending on mood. Both work, but chilling saves time.
Crust Basics I Follow
- Use fine crumbs
- Add enough butter to bind
- Press firmly
- Chill before filling
Making the Chocolate Cheesecake Filling
The filling should feel smooth, thick, and luxurious. I beat the cream cheese until fully smooth before adding anything else. Lumps never fix themselves later. When I add chocolate, I make sure it’s cooled slightly. Hot chocolate and cream cheese don’t get along.
Filling Texture Goals
- Smooth
- Creamy
- Glossy
- Not overmixed
Eggs: Handle Them Gently
Eggs help set the cheesecake, but too much enthusiasm ruins texture. I add them one at a time and mix just until combined. Cheesecake prefers calm energy. Ever had rubbery cheesecake? Overmixed eggs usually caused it.
Egg Tips
- Use room-temperature eggs
- Add one at a time
- Mix slowly
- Stop as soon as blended
Baking Without Stress
Chocolate cheesecake bars bake at a lower temperature than brownies. That gentle heat keeps the texture creamy. I watch the center closely instead of the clock. The bars should jiggle slightly in the middle when done. That jiggle means success.
Baking Guidelines
- Moderate oven temperature
- Center rack placement
- No overbaking
- Check for slight jiggle
Cooling: The Most Ignored Step
Cooling matters more than baking. I let the bars cool gradually at room temperature before chilling. Sudden temperature changes cause cracks. Patience here saves the look and texture.
Cooling Tips
- Cool at room temperature
- Then refrigerate
- Minimum 4 hours chill
- Overnight for best results
Texture: What Perfect Bars Feel Like
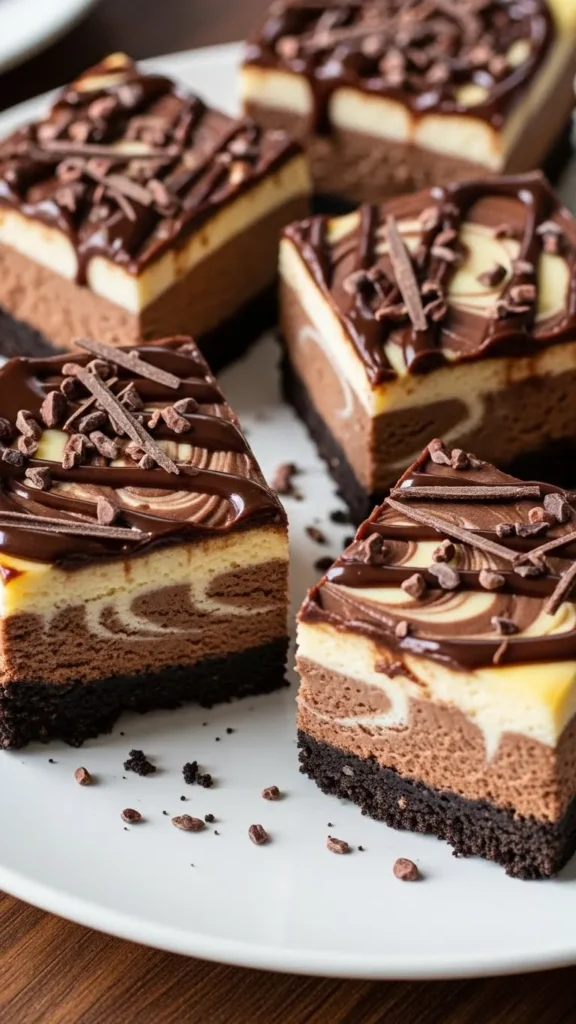
Great chocolate cheesecake bars feel dense but creamy. They shouldn’t crumble or feel mousse-like. Every bite should melt slowly. I aim for clean slices that hold shape but soften on the tongue.
Ideal Texture Breakdown
- Firm crust
- Creamy center
- Smooth top
- No dryness
Flavor Balance: Chocolate vs Cheesecake
Chocolate should enhance, not overpower, the cheesecake. I like when both flavors show up clearly. Too much chocolate hides the tangy cream cheese notes. Balance keeps these bars addictive instead of overwhelming.
Balancing Tricks
- Dark chocolate
- Moderate sugar
- Vanilla for warmth
- Pinch of salt
Cutting Clean Cheesecake Bars
Clean slices make a huge difference visually. I use a sharp knife and wipe it between cuts. Warm blades help even more. Ever sliced too early and watched everything smear? Yeah, wait.
Cutting Tips
- Fully chilled bars
- Sharp knife
- Clean blade between cuts
- Slow, steady motion
Serving Chocolate Cheesecake Bars
These bars don’t need much help. I sometimes add whipped cream or chocolate shavings, but plain works beautifully. The flavor carries itself. They pair perfectly with coffee or strong tea. Simple wins here 🙂
Serving Ideas
- Serve chilled
- Optional whipped cream
- Light dust of cocoa
- Small plates
Storage and Shelf Life

Chocolate cheesecake bars store well in the fridge. I keep them covered so they don’t absorb fridge smells. Cheesecake acts like a sponge. They stay great for several days.
Storage Basics
- Airtight container
- Refrigeration
- Consume within 4–5 days
- Avoid room temperature storage
Common Mistakes to Avoid
Most issues come from rushing or overmixing. High heat, too much air, or skipping chill time all show up in the final texture. I’ve learned these lessons the hard way.
Watch Out For
- Warm ingredients
- Overmixing
- Overbaking
- Skipping chill time
Are Chocolate Cheesecake Bars Worth Making?
Absolutely. They deliver bakery-level results without bakery-level stress. You get indulgent flavor, easy serving, and consistent results. Once you make them, they tend to disappear fast. That’s usually the best review.
Final Thoughts
Chocolate cheesecake bars prove that indulgent desserts don’t need complexity. With good chocolate, smooth cream cheese, and a little patience, you get rich, creamy bars that feel special every time. Each bite balances chocolate depth with classic cheesecake tang. If you want a dessert that feels impressive but stays manageable, these bars deserve a permanent spot in your rotation. Just don’t expect leftovers.