Chocolate Tart Recipe – Easy Homemade Chocolate Dessert
Chocolate tart feels like the grown-up, slightly mysterious cousin of chocolate pie. It’s rich, sleek, and quietly confident without screaming for attention. I make a chocolate tart when I want dessert to feel elegant but still deeply comforting. Ever noticed how a chocolate tart looks fancy even before you take a bite? The first time I made one, I expected complicated steps and a stressed-out kitchen. Instead, I got a smooth filling, a crisp crust, and instant confidence. Chocolate tart teaches you quickly that simplicity, when done right, hits harder than overcomplication.
Why Chocolate Tart Feels So Sophisticated
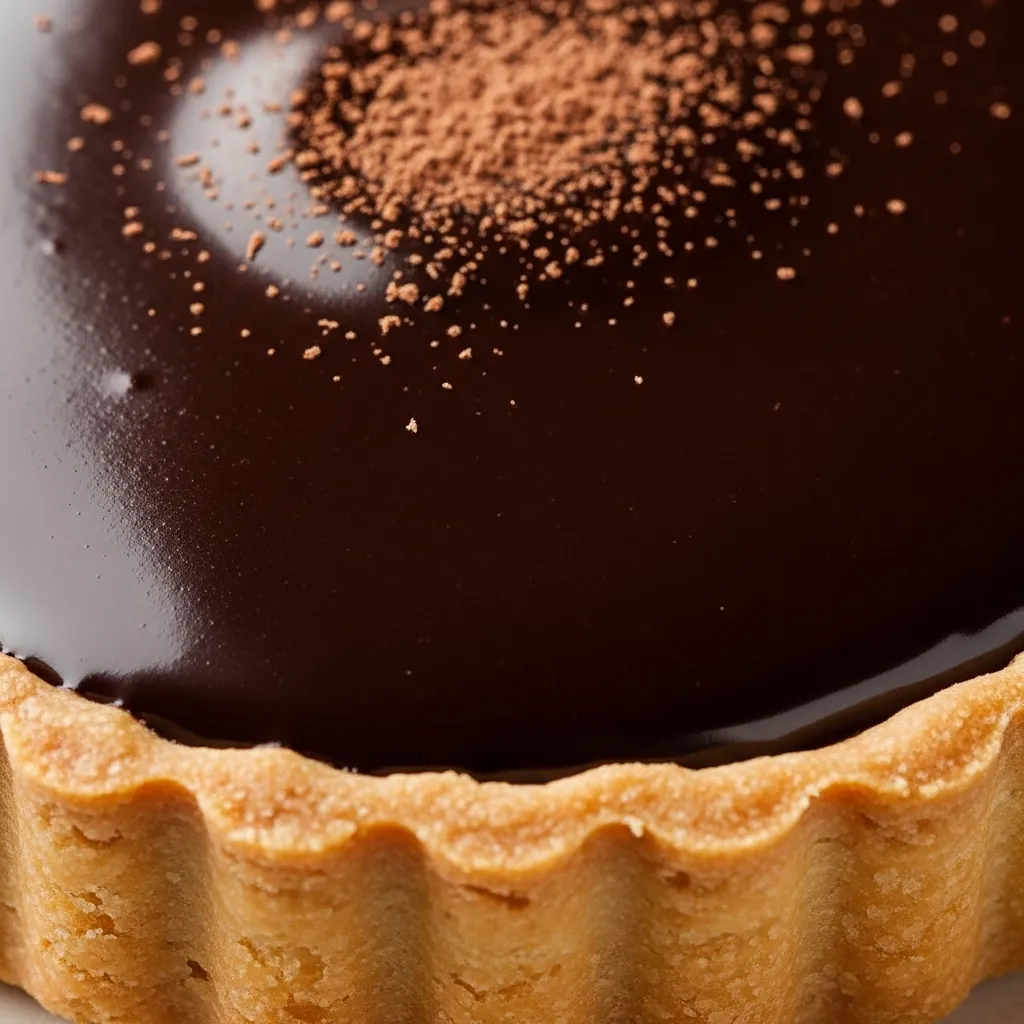
Chocolate tart works because it keeps things focused. There’s no fluff, no distractions, just chocolate doing what it does best. The clean lines and glossy top give it that bakery-window energy. I love how every bite feels intentional. It’s rich, yes, but controlled. You don’t feel overwhelmed, just satisfied.
What Makes It Stand Out
- Deep chocolate flavor stays front and center
- Firm yet silky texture feels luxurious
- Crisp crust balances the filling
- Minimal ingredients create maximum impact
Ingredients You’ll Need

Since this tart keeps things minimal, ingredients matter a lot. Shortcuts show immediately, and chocolate never forgets. I learned that the hard way. Chocolate cookie crust also works if you want extra drama.
For the Crust
- All-purpose flour
- Unsalted butter, cold
- Powdered sugar
- Egg yolk
- Pinch of salt
For the Chocolate Filling
- Dark chocolate, chopped
- Heavy cream
- Unsalted butter
- Eggs
- Granulated sugar
- Vanilla extract
- Pinch of salt
Choosing the Right Chocolate
Chocolate defines this tart, so choose wisely. I always go dark because it delivers intensity without excess sweetness. Milk chocolate softens the flavor too much, IMO. Ever had a chocolate dessert that looked stunning but tasted dull? That’s almost always a chocolate quality issue.
Chocolate Rules I Stick To
- Use 60–70% dark chocolate
- Avoid chocolate chips
- Taste before baking
- Combine creaminess with depth
Making the Tart Crust
The crust needs to feel crisp but tender, not tough. Cold butter creates that delicate texture, and gentle handling keeps it from turning dense. I mix just until it comes together. Pressing it evenly into the pan matters more than people think. Uneven crust means uneven baking, and that shows fast.
Crust Tips That Help
- Keep ingredients cold
- Avoid overmixing
- Press evenly into the pan
- Chill before baking
Blind Baking Without Stress
Blind baking sets the crust so it stays crisp under the filling. I used to skip this step and regret it every time. Soggy crust ruins the vibe instantly. Once baked, the crust should feel dry and lightly golden. That’s your green light.
Blind Baking Basics
- Use parchment and weights
- Bake until edges set
- Remove weights to finish
- Cool completely
The Chocolate Filling Explained
Chocolate tart filling feels luxurious but stays surprisingly simple. Warm cream melts chocolate, eggs add structure, and butter smooths everything out. Gentle heat keeps it silky. I learned quickly not to rush. Ever overheated chocolate and watched it seize? Yeah, slow wins every time.
How the Filling Comes Together
- Cream melts the chocolate
- Eggs create a soft set
- Butter adds shine
- Salt sharpens flavor
Avoiding Cracks and Grainy Texture
Cracks usually mean overbaking. Grainy texture comes from overheating chocolate or eggs. I bake just until the center barely sets and still has a slight jiggle. Residual heat finishes the job. Trust it.
Smooth Filling Tips
- Bake low and slow
- Don’t overmix
- Pull early, not late
- Let it cool gradually
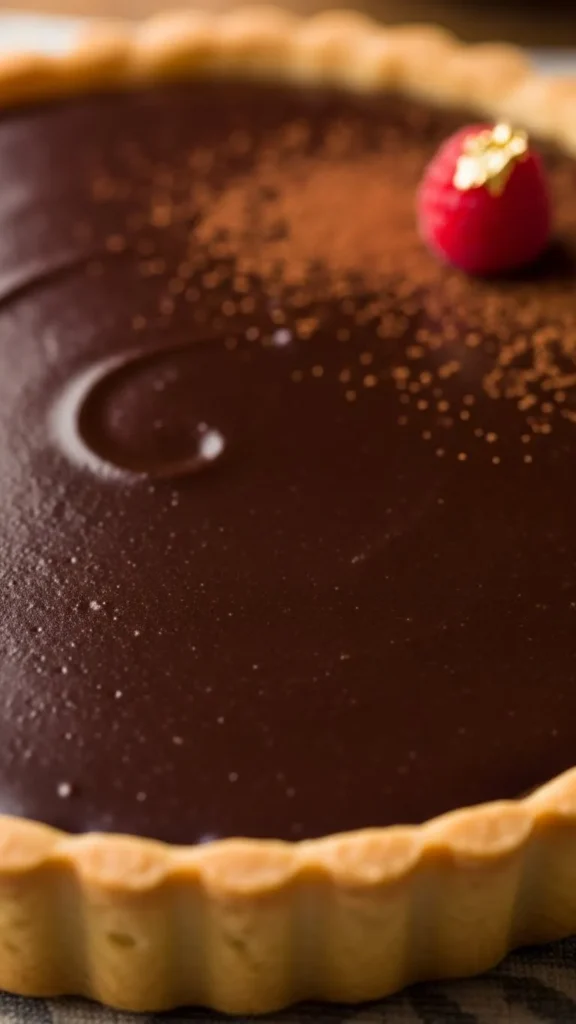
Texture: What a Perfect Chocolate Tart Feels Like
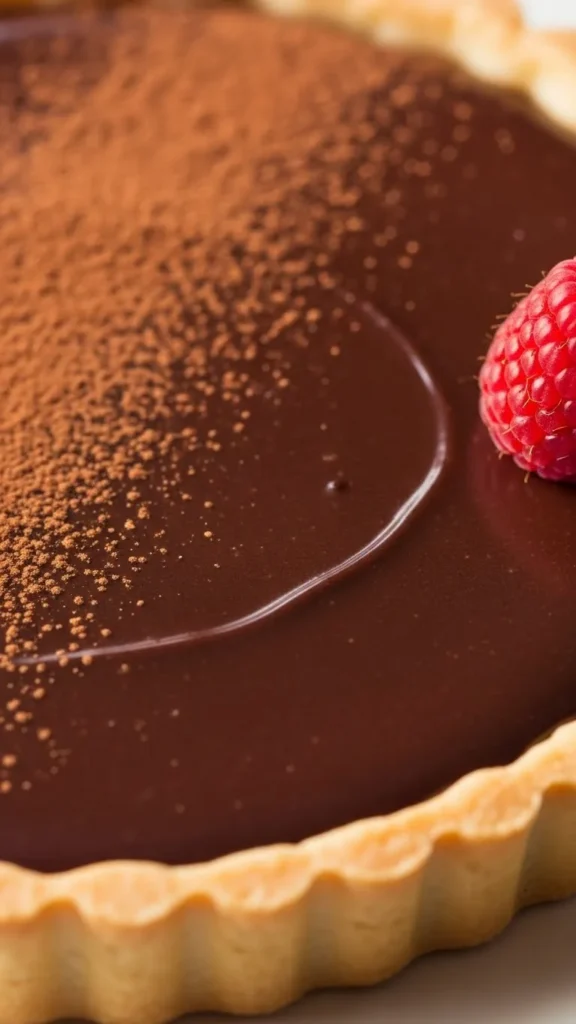
A great chocolate tart feels firm enough to slice but soft on the tongue. It shouldn’t feel mousse-like or stiff like fudge. Balance matters. I aim for a texture that melts slowly. Ever had a tart that felt dry? That’s overbaking every time.
Ideal Texture Breakdown
- Crisp crust
- Smooth, dense filling
- Clean slices
- Melt-in-your-mouth finish
Flavor Enhancements That Work
Chocolate tart doesn’t need much, but subtle flavors can elevate it. I keep additions restrained so chocolate stays dominant. Big flavors steal focus here. That salt sprinkle? Quietly iconic.
Subtle Add-Ins I Like
- Vanilla extract
- Espresso powder
- Orange zest
- Flaky sea salt on top
Serving Chocolate Tart
Chocolate tart looks best with minimal styling. A clean slice, maybe a dollop of cream, and you’re done. Overdecorating cheapens the elegance. I serve it slightly cool, not ice-cold. Temperature affects flavor more than people realize.
Serving Tips I Use
- Warm knife for clean cuts
- Wipe between slices
- Serve slightly chilled
- Add toppings lightly
Storage and Make-Ahead Tips
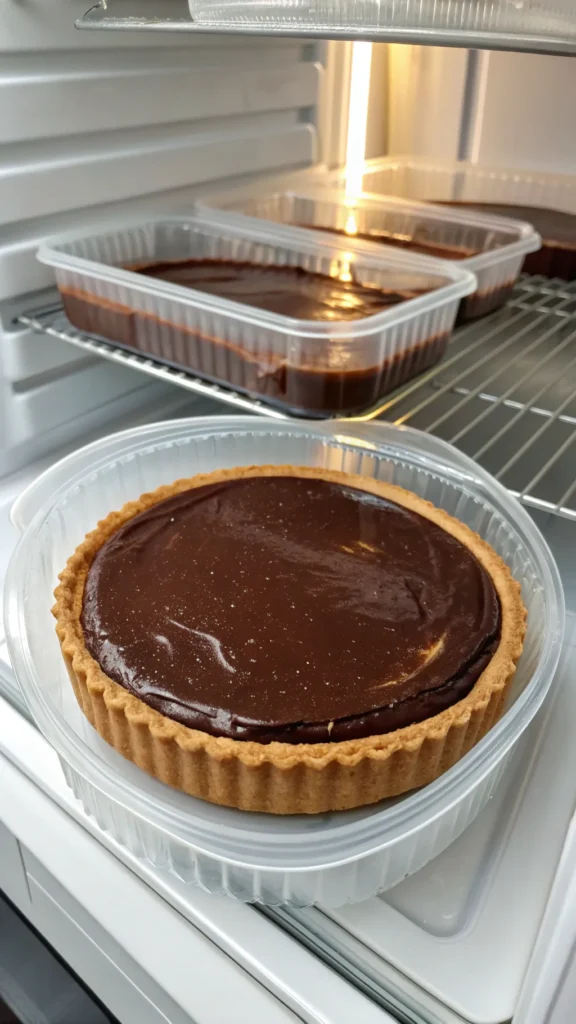
Chocolate tart stores beautifully, which makes it perfect for planning ahead. I often make it a day before serving. The flavor actually deepens. Just keep it protected in the fridge. Chocolate absorbs everything.
Storage Basics
- Cover loosely
- Refrigerate up to 3 days
- Avoid strong odors
- Bring to cool room temp before serving
Common Chocolate Tart Mistakes
Most problems come from rushing or overbaking. High heat kills smooth texture, and poor chocolate kills flavor. I’ve made those mistakes so you don’t have to. Ever wondered why bakery tarts feel silkier? Time and restraint.
What Really Matters
- Quality chocolate
- Gentle heat
- Proper chilling
- Balanced sweetness
Is Chocolate Tart Worth Making at Home?
Absolutely. Homemade chocolate tart tastes cleaner, richer, and more intentional than store-bought versions. It also builds confidence fast. Once you master this, ganache-based desserts stop feeling intimidating. That’s a big win.
Final Thoughts
Chocolate tart proves that elegance doesn’t require complexity. A crisp crust, smooth filling, and good chocolate create something timeless and deeply satisfying. Every bite feels deliberate. If you’ve been saving chocolate tart for “special occasions,” consider this permission to make it now. Good chocolate doesn’t need a reason.