Ice Cream Walls Oreo Cone
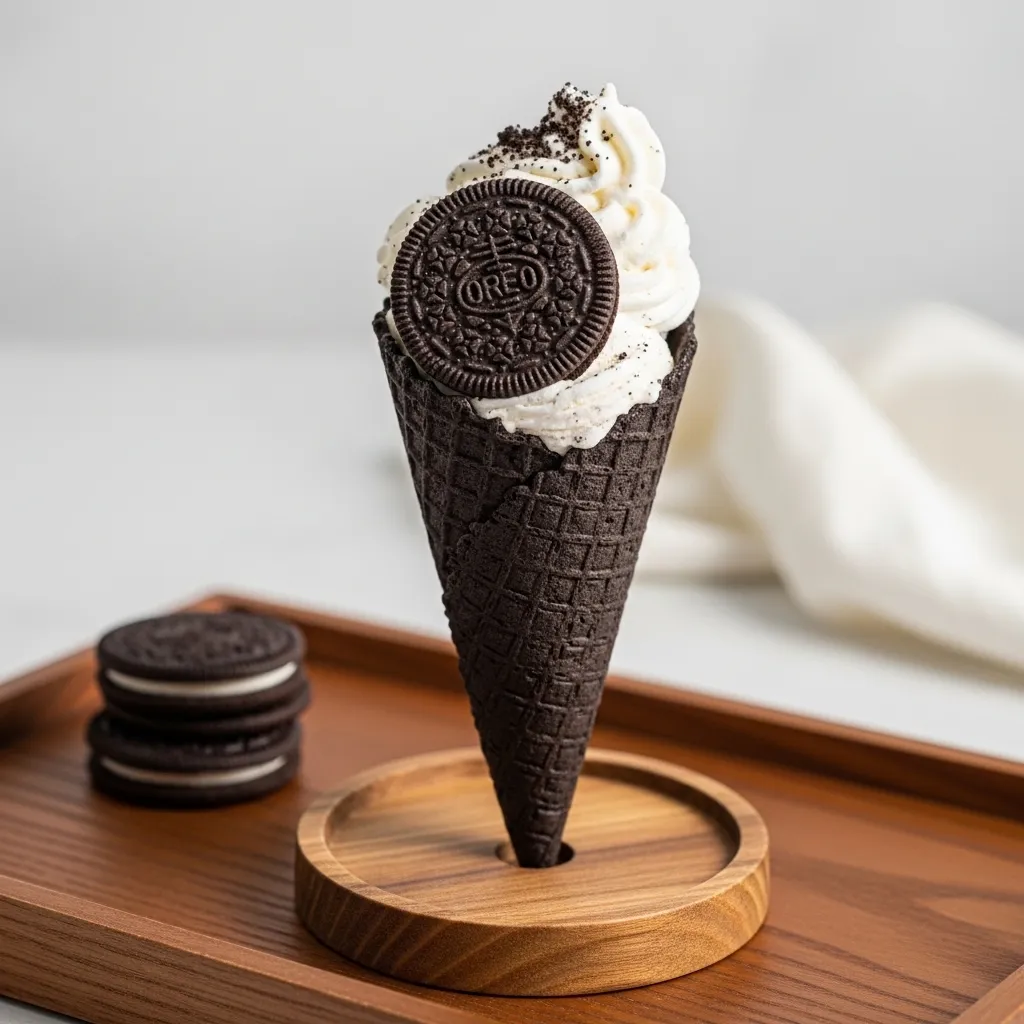
So you want a dessert that looks like it belongs in a fancy dessert shop but requires the skill level of “I can open a package”? Perfect. Because this Ice Cream Walls Oreo Cone situation is dramatic, crunchy, creamy, and honestly kind of extra in the best way. Imagine a crispy cone lined with Oreo cookie “walls,” stuffed with creamy ice cream, and basically begging to be devoured. It’s the kind of treat that makes people say, “Wait… you made that?” And you just nod like a humble dessert genius. Let’s build some edible architecture.
Why This Recipe is Awesome
First of all, it’s stupidly easy. No baking. No complicated techniques. No “fold gently while chanting under a full moon” nonsense. Second, it looks impressive. The Oreo walls give this cool layered effect inside the cone, so when you bite into it, you get crunchy cookie + creamy ice cream in every single bite. That’s texture magic right there. Third, it’s customizable. Chocolate overload? Go for it. Fruity and fun? Sure. Want to mix in candy, caramel, or chaos? I support you. And finally, it’s low effort, high reward. IMO, that’s the best category of recipes to exist.
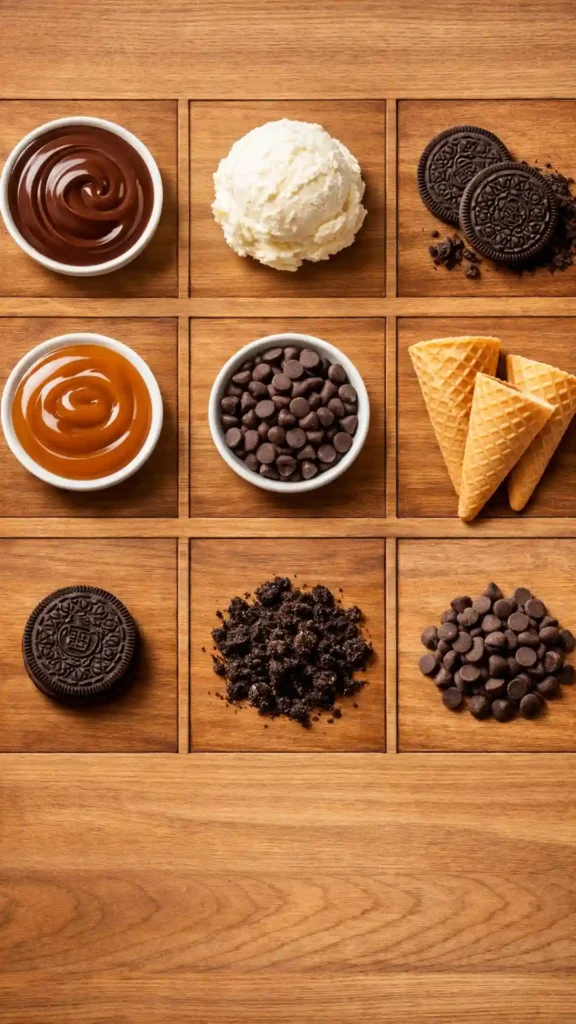
Ingredients You’ll Need
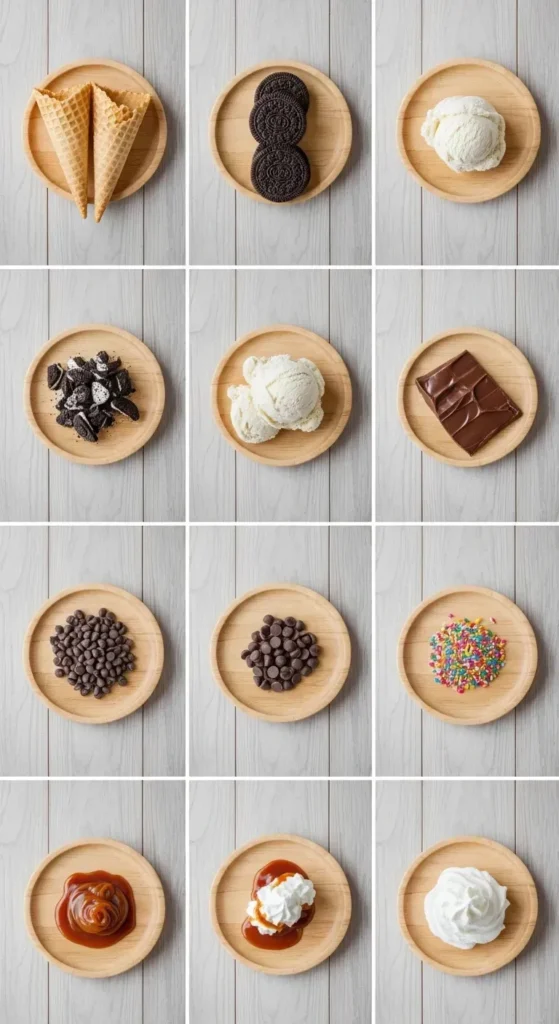
Keep it simple. We’re not running a pastry school here.
- 6–8 waffle cones (the sturdy kind, not the flimsy drama queens)
- 12–16 Oreo cookies (regular or double-stuffed, your call)
- 1 quart vanilla ice cream (or any flavor you’re obsessed with)
- 1/2 cup melted chocolate (for sealing and extra deliciousness)
- Optional toppings:
- Crushed Oreos
- Chocolate chips
- Sprinkles
- Caramel sauce
- Whipped cream
Tip: Slightly soften the ice cream before assembling. Not melted soup. Just scoopable.
Step-by-Step Instructions
- Prep Your Cones
Melt your chocolate in the microwave in 20-second bursts. Stir until smooth. Dip the inside rim of each cone into the melted chocolate. This helps the cookies stick and also adds flavor. - Build the Oreo Walls
Gently press Oreo cookies vertically against the inside walls of the cone. You may need to slightly twist or break one to make it fit. Don’t stress about perfection; we’re not building the Taj Mahal. - Seal the Bottom
Spoon a little melted chocolate into the bottom of each cone. This prevents ice cream leakage. Because nobody wants a drip disaster five seconds in. - Fill with Ice Cream
Scoop softened ice cream into the cone. Press it down slightly so it fills all the spaces between the Oreos. Don’t leave air pockets unless you enjoy disappointment. - Add Toppings
Sprinkle crushed Oreos or chocolate chips on top. Drizzle caramel or more melted chocolate. Go wild, but keep it balanced unless you want structural collapse. - Freeze to Set
Place the cones upright in a glass or muffin tin. Freeze for at least 1–2 hours until firm. This step is crucial. Do not skip it unless you enjoy messy regrets. - Serve and Show Off
Take them out, admire your work, and casually pretend this took way more effort than it did.
Common Mistakes to Avoid
Using soft cones.
If your cones are thin and fragile, they will betray you. Choose thick waffle cones that can handle the Oreo weight.
Skipping the chocolate seal.
You think it’s optional? It’s not. Without that chocolate plug at the bottom, ice cream will escape like it’s on a mission.
Overfilling the cone.
Yes, we love abundance. But if you stack ice cream too high, it’ll tip over or slide off. Keep it cute and controlled.
Not softening the ice cream slightly.
Rock-hard ice cream makes stuffing the cone nearly impossible. Let it sit for 5–10 minutes. Don’t microwave it. That’s chaos.
Forgetting to refreeze.
If you serve immediately, everything shifts. Freeze it. Trust me.
Alternatives & Substitutions
Not into vanilla?
Use cookies and cream, chocolate, strawberry, or mint chocolate chip. The Oreo walls pair best with chocolate-based flavors, but honestly, it’s hard to mess this up.
No Oreos?
Use chocolate chip cookies or thin sandwich cookies. They just need to fit snugly along the inside.
Want it extra fancy?
Coat the entire inside of the cone with chocolate first, let it harden, then add the Oreos. It adds a crunchy shell that feels very gourmet.
Need a dairy-free version?
Use dairy-free ice cream and vegan chocolate sandwich cookies. Easy swap.
Feeling dramatic?
Dip the entire outside rim of the cone in chocolate and roll it in crushed Oreos before filling. It’s unnecessary. It’s beautiful. I recommend it.
Final Thoughts
This Ice Cream Walls Oreo Cone recipe is proof that you don’t need complicated steps or fancy tools to create something that looks impressive. It’s crunchy, creamy, fun, and slightly dramatic in the best way. It’s perfect for parties, movie nights, birthdays, or random Tuesday cravings when you just want to feel like a dessert wizard. So grab those cones, line them with cookies like the snack architect you are, and freeze up some happiness. Then go impress someone. Or just eat two yourself. I won’t judge.