Microwave Caramel Custard
In the world of classic desserts, the Caramel Custard (or Crème Caramel) is the ultimate test of finesse. It is a dish defined by its contradictions: a bitter, glass-like burnt sugar top that gives way to a silky, trembling, ultra-smooth vanilla cream. Traditionally, this is a high-stakes bake involving a bain-marie (water bath), a low-temperature oven, and at least an hour of nervous checking to ensure the eggs don’t curdle.
The Microwave Caramel Custard is a culinary rebellion. It takes a process that usually requires a chemistry degree and a lot of patience and condenses it into a series of strategic “zaps.” By using the microwave’s ability to reach high temperatures rapidly for the caramel and gentle, pulsing energy for the custard, you can create a centerpiece-worthy dessert in under ten minutes.
The Two-Stage Physics: Caramel vs. Custard
A microwave caramel custard works because it respects two different scientific principles in one bowl.
- Stage One: The Sugar Transformation. Sugar melts and caramelizes at roughly 320°F (160°C). In a microwave, sugar combined with a tiny amount of water becomes a concentrated heat trap. The waves vibrate the sugar molecules until they break down, changing from sweet white granules into a complex, amber-colored liquid.
- Stage Two: The Egg Coagulation. Custard, on the other hand, is a delicate protein matrix. Egg proteins begin to set around 145°F (63°C). If they hit the boiling point, they tighten up and squeeze out all the moisture, leaving you with “sweet scrambled eggs.” The microwave handles this by using residual heat—the caramel stays hot enough to cook the bottom of the custard while the microwave gently sets the top.
Ingredients: The Purest Trio
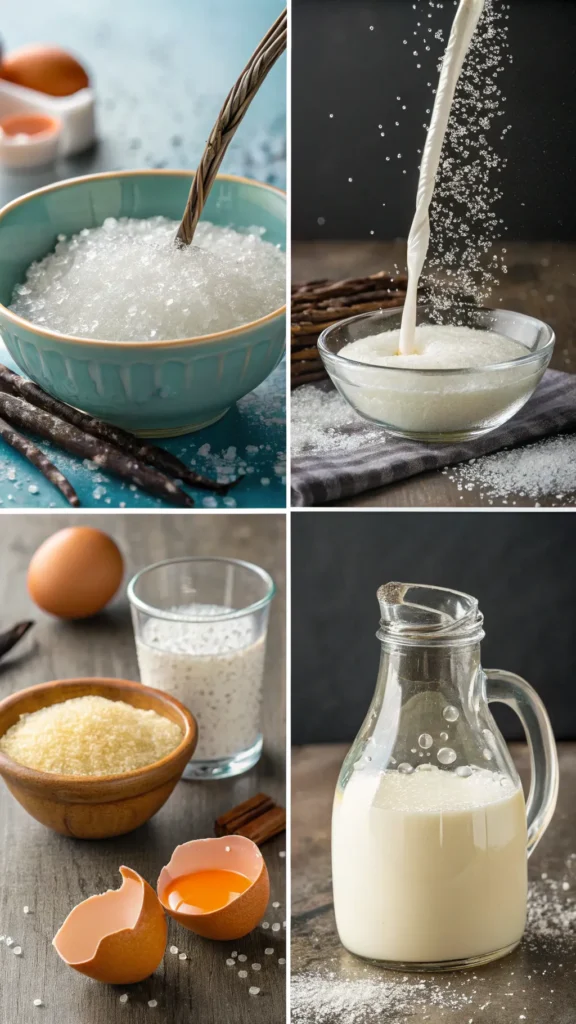
Because this dish has so few ingredients, there is nowhere for low quality to hide.
- The Caramel:
- 3 tbsp Granulated Sugar: White sugar works best for a clear, clean caramel.
- 1 tbsp Water: To help the sugar melt evenly.
- The Custard:
- 1 Large Egg: At room temperature (this prevents the caramel from cracking when you pour the mix in).
- ¾ cup Whole Milk: For a rich, creamy texture.
- 2 tbsp Granulated Sugar: To sweeten the cream.
- ½ tsp Vanilla Extract: The aromatic heart of the dish.
Step-by-Step Instructions
Part 1: The Caramel Base
- The Mix: In a small, microwave-safe glass ramekin (ensure it is heat-resistant), combine 3 tbsp sugar and 1 tbsp water. Stir until it looks like wet sand.
- The Heat: Microwave on high in 30-second increments. Watch it like a hawk.
- The Color: Around the 2-minute mark, the sugar will start to bubble and then turn a pale gold. Once it hits a light amber color, stop immediately. The caramel will continue to darken and get hotter after you pull it out.
- The Set: Swirl the ramekin gently to coat the bottom, then set it aside to harden. It will become a hard, glass-like sheet in about 2 minutes.
Part 2: The Custard Filling
- The Whisk: In a separate bowl, whisk the egg and 2 tbsp sugar together until combined but not frothy. You want to avoid creating air bubbles, which lead to “holes” in your custard.
- The Liquid: Gradually whisk in the milk and vanilla extract.
- The Strain (Pro Tip): Pour the mixture through a fine-mesh strainer into the ramekin over the hardened caramel. This removes any “bits” of egg white for a perfectly smooth finish.
- The Gentle Zap: Cover the ramekin loosely with plastic wrap or a saucer. Microwave at 50% power (Medium) for 2 to 3 minutes.
- The Jiggle Test: Stop when the edges are set but the center still has a slight “jiggle” like jelly. Do not wait for the center to be firm, or it will be overcooked by the time it cools!
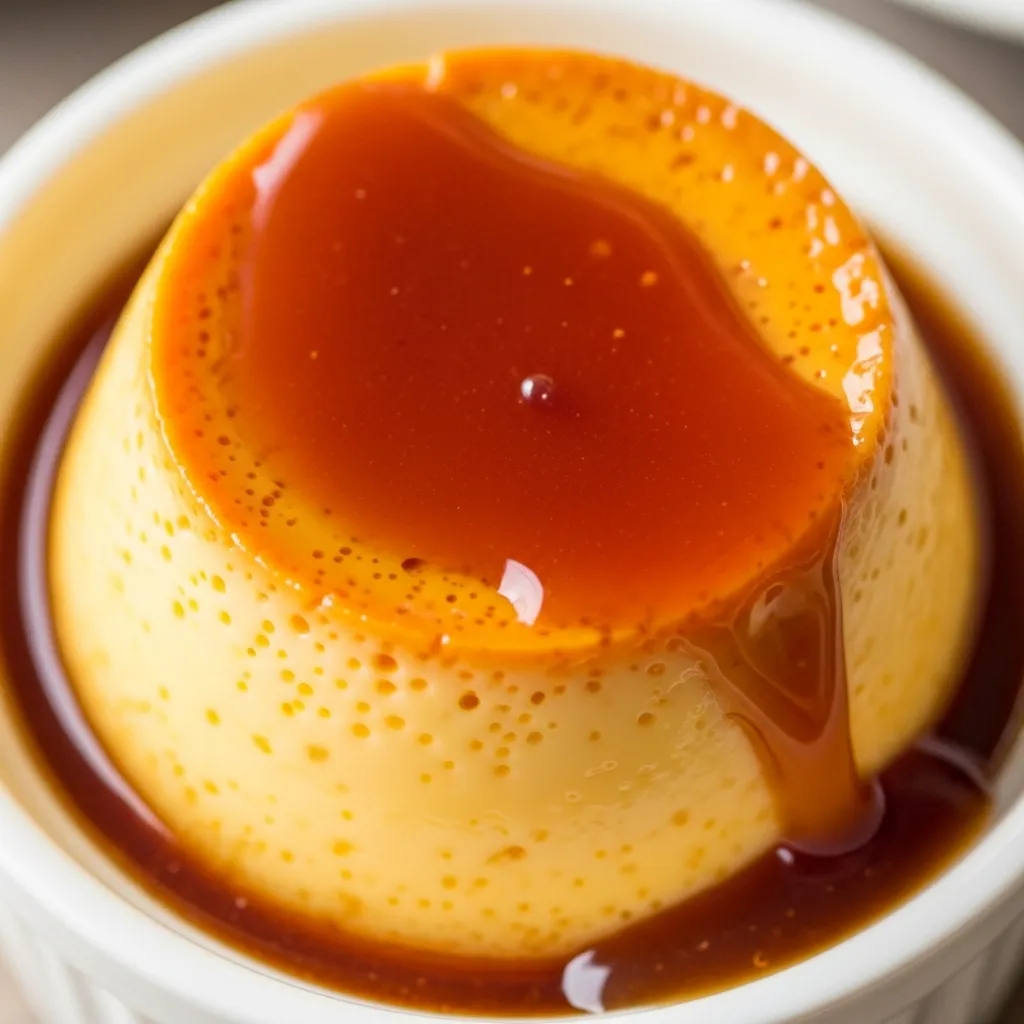
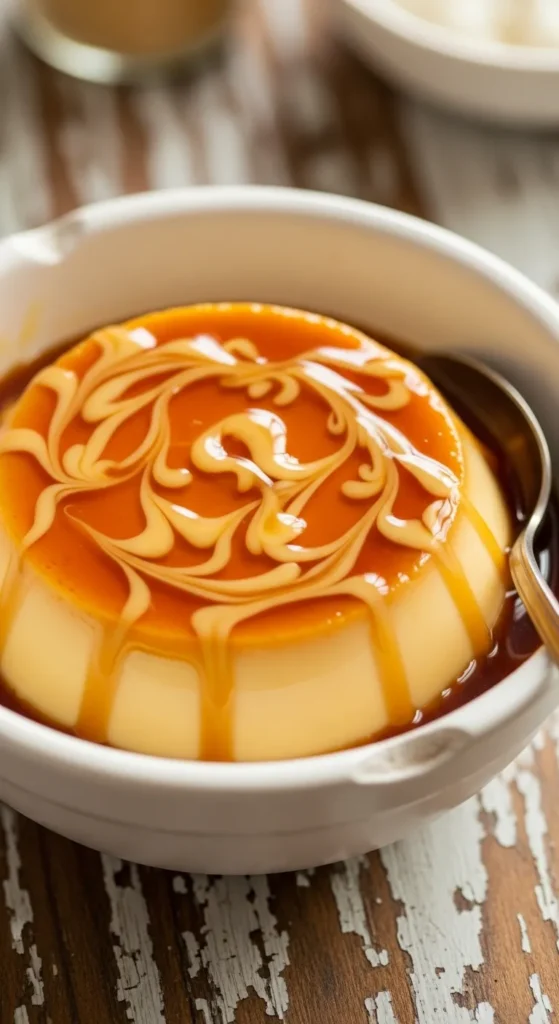
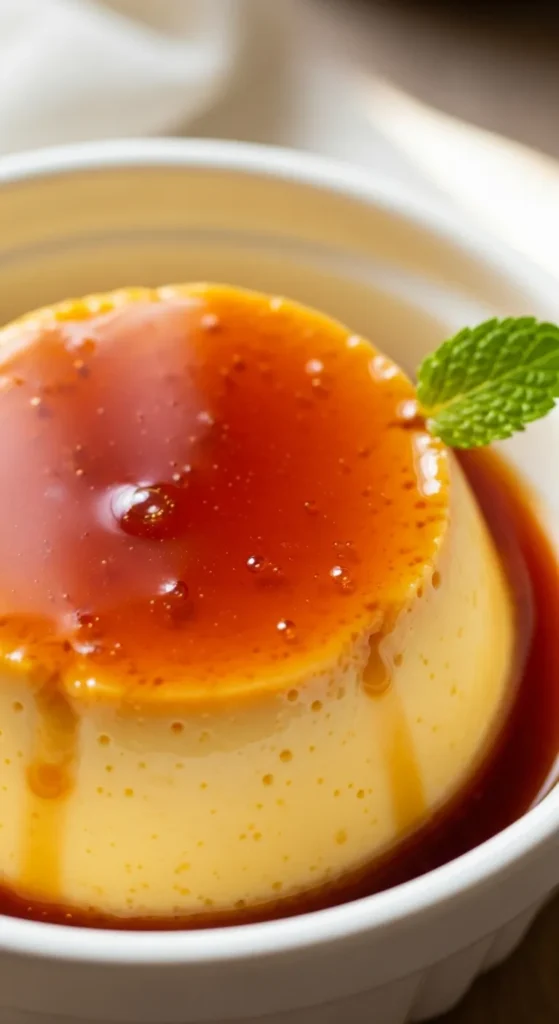
The “Grand Reveal”: Inverting the Custard
You cannot eat caramel custard hot. As it chills, the hardened caramel at the bottom reacts with the moisture in the custard and turns back into a delicious, liquid gold syrup.
- The Chill: Let the ramekin reach room temperature, then refrigerate for at least 3 hours (overnight is best).
- The Release: Run a thin, sharp knife around the inside edge of the ramekin.
- The Flip: Place a small dessert plate over the ramekin. In one swift motion, flip them over. You will hear a satisfying thwack as the custard drops, followed by a waterfall of caramel syrup.
Common Mistakes to Avoid
- Burning the Sugar: Caramel goes from “perfect amber” to “bitter black” in about five seconds. If it looks a little too light, it’s probably perfect. If it smells like smoke, throw it out and start over.
- Too Many Bubbles: If you whisk the eggs too vigorously, you’ll incorporate air. These air pockets expand in the microwave and create a “sponge” texture instead of a silky cream. Whisk gently!
- High Power Cooking: Cooking the custard on 100% power is the fastest way to get rubbery eggs. Always use 50% power to mimic the gentle heat of a water bath.
- Skipping the Strainer: No matter how well you whisk, there are always tiny strands of egg white. Straining is the difference between a “home cook” and a “pastry chef” result.
Flavor Variations
- The “Coffee” Custard: Dissolve ½ tsp of instant espresso powder into the milk before whisking.
- Orange Blossom: Add a tiny drop of orange blossom water or fresh orange zest to the custard.
- Coconut Flan: Replace half the whole milk with full-fat canned coconut milk.
- Salted Caramel: Add a generous pinch of sea salt to the liquid caramel before it hardens in the ramekin.
Final Thoughts
Microwave Caramel Custard is a triumph of modern cooking. It proves that one of the most intimidating desserts in the French repertoire can be mastered by anyone with a microwave and a bit of attention to detail. It is the perfect “impressive” dessert for a date night or a solo treat that feels like a luxury. It is silky, it is sweet, and the way the caramel sauce pools around the cream is a visual and culinary delight.