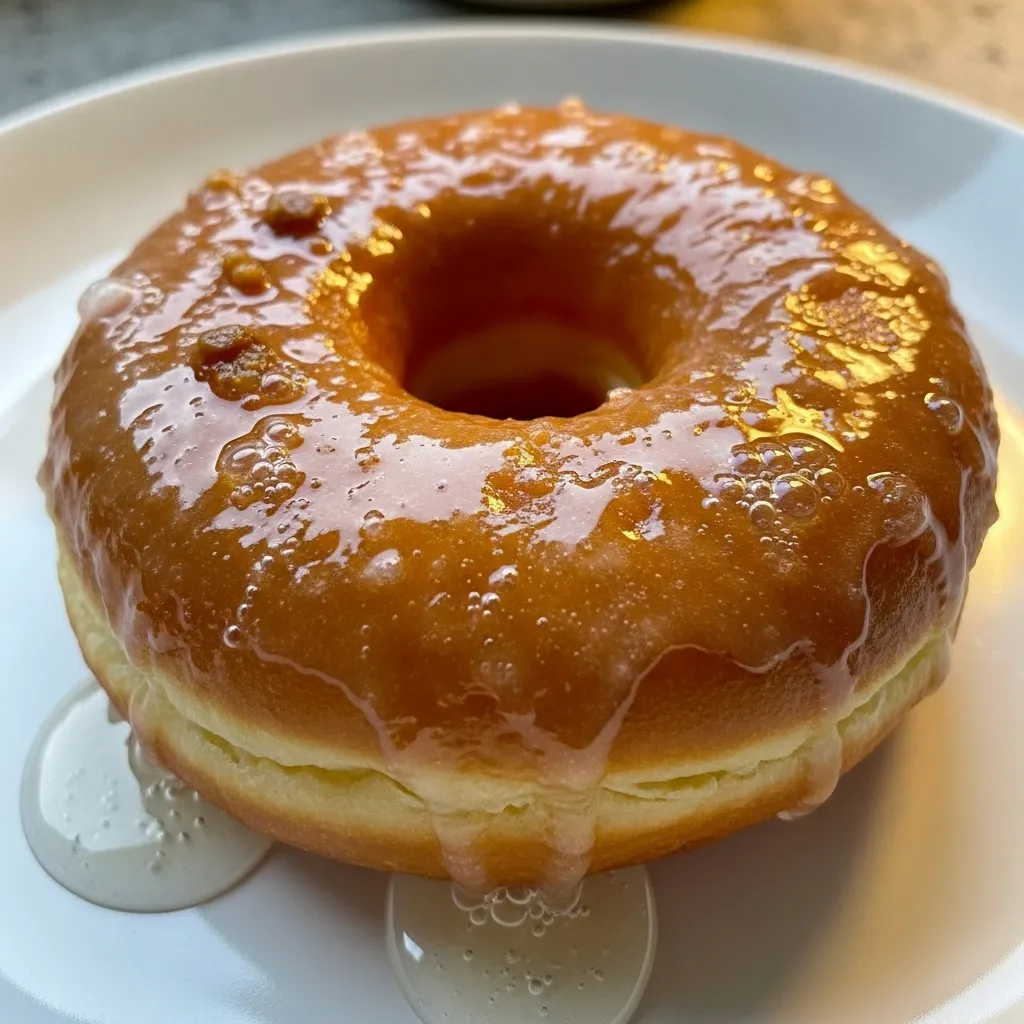
Microwave Glazed Donut

There is a specific kind of culinary emergency that only a glazed donut can solve. It usually strikes at 10:00 PM on a Tuesday, or perhaps during a rainy Sunday afternoon when the thought of putting on shoes and driving to a bakery feels like a Herculean task. Traditionally, donuts are a labor of love, they require yeast, multiple rises, a thermometer for hot oil, and the inevitable cleanup of a flour-dusted kitchen. The Microwave Glazed Donut is the antithesis of that struggle. It is a modern marvel of “mug-cake” technology, engineered for the person who wants the soft, pillowy, sugar-coated satisfaction of a donut in the time it takes to watch a few television commercials.
The Science of the Microwave “Bake”
To appreciate the microwave donut, one must understand that a microwave doesn’t actually “bake” in the traditional sense; it excites water molecules to create steam. In a conventional oven, dry heat creates a crust. In a microwave, the heat is internal and moist. This is actually a massive advantage for a donut. By using a high-moisture batter with a significant amount of leavening (baking powder), we create a rapid rise. The steam trapped inside the batter “sets” the flour and egg structure almost instantly, resulting in a texture that is closer to a high-end steamed pudding or a moist sponge cake.
Ingredients: The Pantry Powerhouse
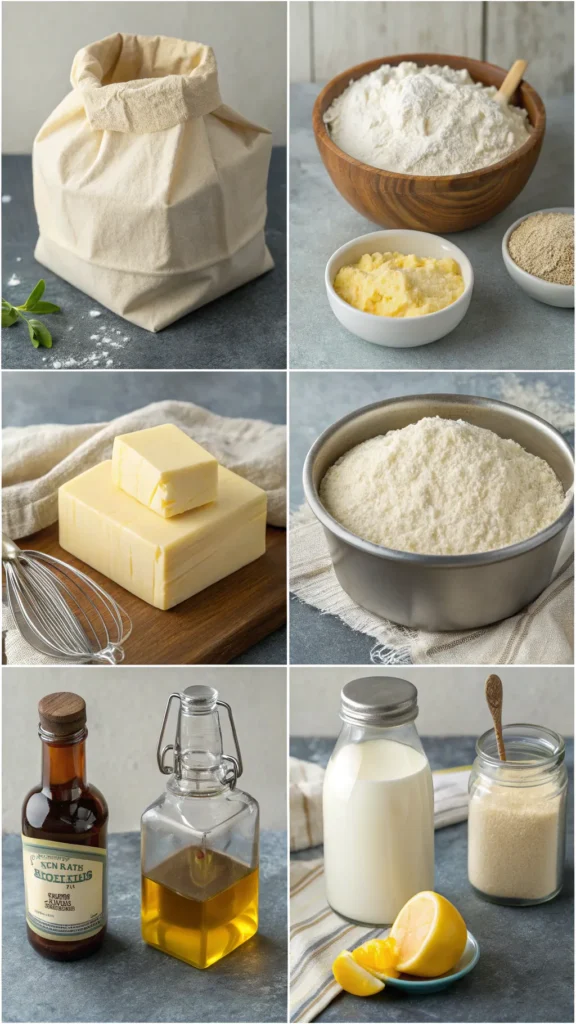
One of the best things about this recipe is that you likely already have everything you need. There are no “specialty” ingredients required, just standard kitchen staples.
The Donut Batter
- 4 tbsp All-Purpose Flour: This provides the essential gluten structure.
- 2 tbsp Granulated Sugar: Just enough sweetness to flavor the dough without making it cloying.
- ½ tsp Baking Powder: This is your engine. It provides the rapid “poof” needed to make the donut light.
- A Pinch of Salt: Never skip this; it’s what makes the vanilla and butter flavors actually taste like something.
- 3 tbsp Whole Milk: Provides the moisture and fat for a rich crumb.
- 1 tbsp Unsalted Butter (Melted): Butter gives it that “bakery” flavor that oil simply cannot replicate.
- ½ tsp Vanilla Extract: The aromatic soul of the donut.
The Signature Glaze
- 4 tbsp Powdered Sugar: Sifted, if you have the patience, to avoid lumps.
- 1 ½ tsp Milk or Heavy Cream: Cream makes for a more opaque, “professional” looking glaze.
- A Tiny Drop of Vanilla: To mirror the flavor of the donut.
Step-by-Step Instructions
- The Dry Foundation: In a small mixing bowl (or directly in a large microwave-safe mug), whisk together the flour, sugar, baking powder, and salt. Ensure there are no large clumps, as these can create “tough” spots in the finished donut.
- The Wet Integration: Pour in the milk, melted butter, and vanilla extract. Whisk gently until the batter is smooth. It should be thicker than pancake batter but thinner than cookie dough—think of a heavy heavy cream consistency.
- The Vessel Prep: * If using a donut mold: Lightly grease a microwave-safe silicone donut mold with butter or non-stick spray.
- If using a mug (The Hack): Grease a wide mug. To create the “hole,” grease a small, heavy-bottomed shot glass and place it right in the center of the mug. Pour the batter around it.
- The Zap: Microwave on high for 45 to 60 seconds.
- Pro Tip: Every microwave is different. Start at 45 seconds. The donut is done when the top looks “set” and matte, not wet or shiny, but still feels springy when touched.
- The Rest (Crucial): Do not touch the donut for at least 60 seconds. It is still cooking internally from the carry-over steam. If you try to glaze it now, the glaze will just melt and vanish into the dough.
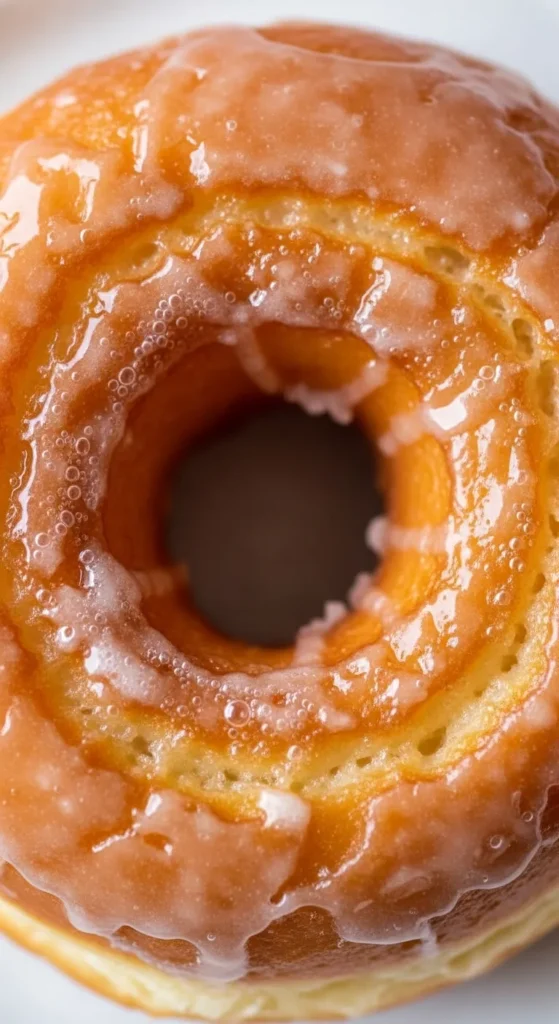
- The Glazing: While the donut rests, whisk your powdered sugar, milk, and vanilla in a shallow bowl until smooth. Once the donut is warm (not hot), dip the top half into the glaze. Let it sit on a plate for another minute to allow the glaze to “crack” slightly as it sets.
Common Pitfalls and How to Avoid Them
- The “Rubber Tire” Effect: This happens when you overcook the donut. Because microwaves evaporate water, an extra 20 seconds can turn a soft donut into a bouncy ball. If your donut is tough, reduce the time by 10 seconds next time.
- The Sinking Donut: This usually happens if you open the microwave door too early or if you used expired baking powder. Ensure your leavening agent is fresh!
- The Disappearing Glaze: If the donut is too hot, the glaze will become a liquid and soak into the bread. It will still taste good, but you won’t get that iconic white “crust” on top. Wait until it’s just warm to the touch.
Variations: Making it Your Own
- The “Maple Bar” Style: Replace the vanilla in the glaze with maple extract and top with a bit of crushed bacon.
- The “Chocolate Dip”: Add 1 tsp of cocoa powder to the glaze and top with rainbow sprinkles.
- The “Double Vanilla”: Use vanilla bean paste instead of extract in the glaze for those beautiful little black specks and a deeper flavor.
Final Thoughts
The Microwave Glazed Donut is a celebration of the “now.” It is an accessible, democratic dessert that proves you don’t need a professional kitchen or three hours of your life to enjoy a classic treat. It is soft, sweet, and perfectly portioned for a single moment of indulgence. In a world that often demands we wait, the microwave donut is a reminder that sometimes, the best things are the ones that happen in under a minute. Now, go grab your favorite mug and get whisking, your 60-second countdown to bliss starts now.