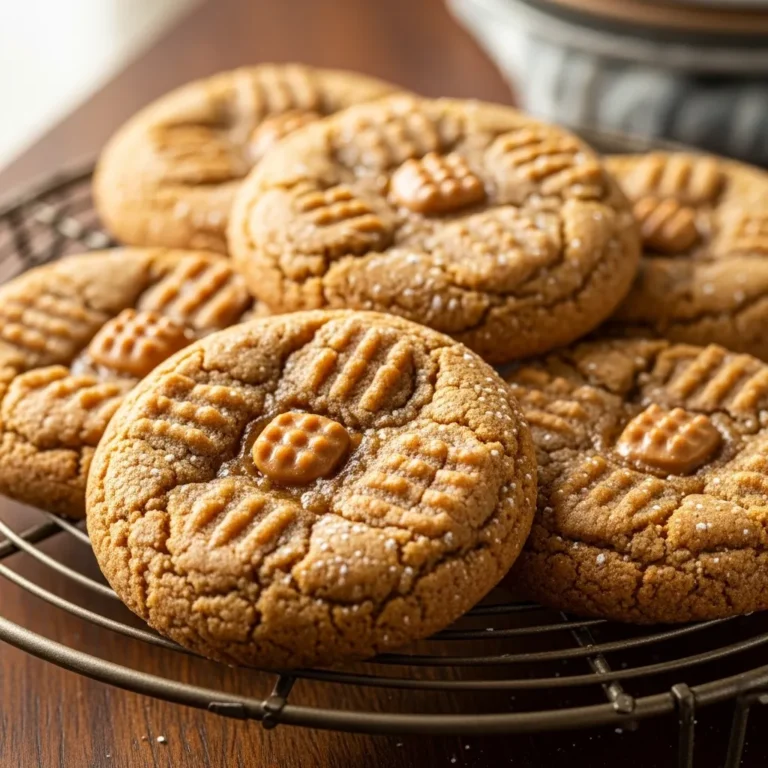
Microwave Oreo Cookie with Soft, Gooey Center
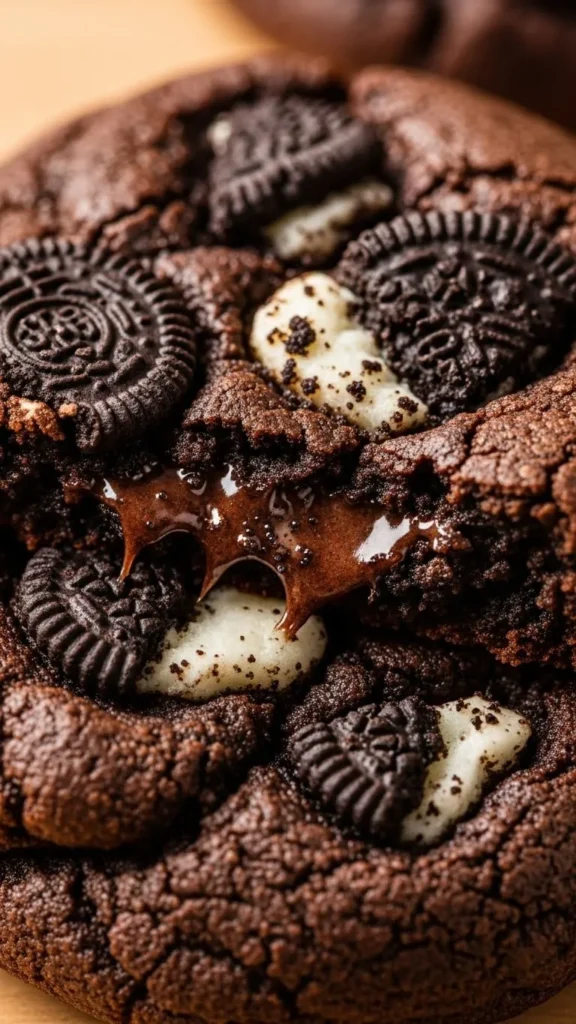
This microwave Oreo cookie exists for moments when a full batch of cookies feels wildly unnecessary. You want something warm, chocolatey, and comforting right now, not after preheating an oven and washing six bowls. I’ve leaned on this recipe more times than I’ll admit, especially during late-night snack emergencies. It’s fast, indulgent, and honestly a little too easy.
Why a Microwave Oreo Cookie Actually Works
Microwaves get a bad reputation for baking, but this recipe plays to their strengths. Instead of aiming for crisp edges, this cookie leans fully into softness and fudginess. That texture works perfectly with crushed Oreos and cocoa-heavy dough. I stopped expecting microwave cookies to behave like oven-baked ones a long time ago. Once you embrace what they do well, the results feel intentional instead of disappointing. Ever noticed how the center of a cookie is always the best part anyway?
The Oreo Factor Changes Everything
Oreos bring more than just chocolate flavor. They add texture, sweetness, and that unmistakable cream-filled nostalgia. When they soften slightly in the microwave, they blend into the dough without disappearing. I like breaking them by hand instead of crushing them into dust. Bigger chunks give you pockets of crunch and cream. Those little surprises make every bite better.
Ingredients You Probably Already Have
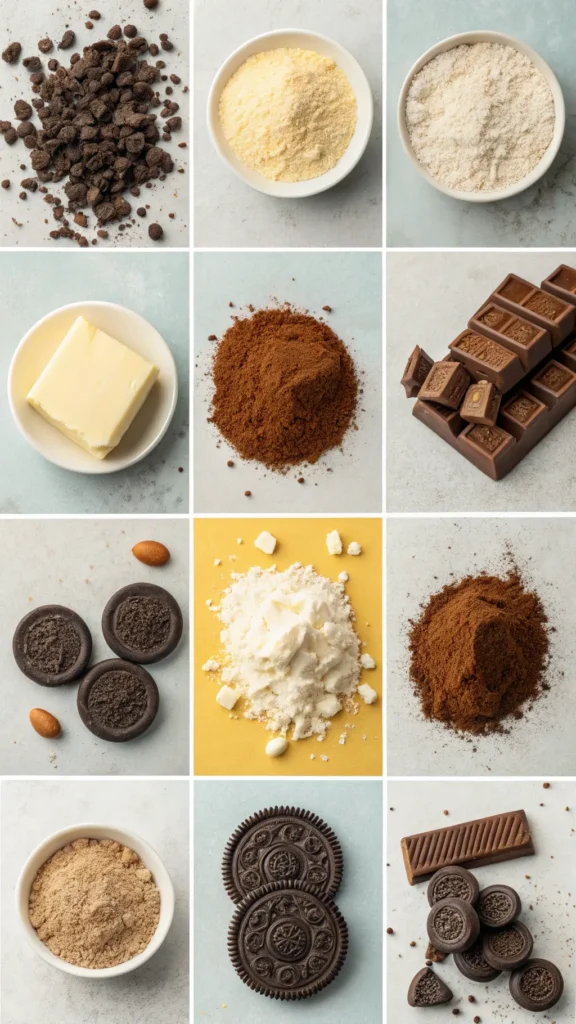
This recipe sticks to simple pantry basics with Oreos doing most of the heavy lifting. You don’t need fancy chocolate or specialty flours. Everything mixes together quickly in one mug or bowl. The ingredient list stays short, which makes this dessert dangerously accessible. If Oreos live in your pantry, you’re already halfway there.
What You’ll Need
- All-purpose flour
- Butter
- Sugar
- Milk
- Cocoa powder
- Vanilla extract
- Crushed Oreos
- Pinch of salt
How to Make It (Step-by-Step Instructions)
Step 1: Prepare the Oreo crumbs
Take 4 Oreo cookies and crush them into fine crumbs using a spoon or rolling pin.
You want a sand-like texture so everything mixes smoothly without lumps.
Transfer the crumbs into a small microwave-safe bowl for easy mixing.
Step 2: Add butter and milk
Pour in 1 tablespoon melted butter and 1 tablespoon milk over the Oreo crumbs.
Mix slowly until the mixture turns into a thick, sticky dough.
If it looks dry, add ½ teaspoon milk at a time, don’t overdo it.
Step 3: Create the gooey center
Press half of the dough into the bottom of the bowl, forming a base.
Place 1 whole Oreo or 1 teaspoon chocolate spread right in the center.
Cover it with the remaining dough and gently seal the edges.
Step 4: Microwave carefully
Microwave on HIGH for 20–25 seconds only, this part is crucial.
The cookie should look just set on top but still soft in the middle.
Over-microwaving will make it dry, so stop early if unsure.
Step 5: Rest and enjoy
Let the cookie sit for 30 seconds after microwaving to finish setting.
This rest time keeps the center molten while the outside stays tender.
Dig in with a spoon and enjoy that warm, gooey Oreo magic 🤍🍪
Why There’s No Egg in This Recipe
Eggs complicate microwave desserts fast. They cook unevenly and shift the texture toward sponge instead of cookie. This recipe skips eggs to keep things smooth, safe, and predictable. Milk adds moisture without changing the structure. The result stays soft and rich instead of rubbery. IMO, egg-free microwave cookies just work better.
Choosing the Right Mug or Bowl Matters
Container size affects how evenly the cookie cooks. A wide mug or small bowl spreads heat better and avoids raw centers. Tall mugs tend to overcook edges before the middle warms up. I always use something microwave-safe with enough room to stir comfortably. Fighting a narrow mug never ends well.
How I Mix It Without Overthinking
I melt the butter directly in the mug to save time and dishes. Then I stir in sugar, milk, and vanilla until everything looks smooth and glossy. That base sets the tone for the texture. Dry ingredients come next, and I mix just until combined. Overmixing stiffens the dough quickly. Gentle stirring keeps the cookie soft and tender.
Mixing Order That Works
- Melt butter
- Stir in sugar and liquids
- Add flour, cocoa, and salt
- Fold in Oreo pieces
Cooking Time Makes or Breaks It
Microwave timing matters more than exact measurements here. Even ten extra seconds can change the texture completely. I always start low and adjust slowly. The goal stays soft and slightly underdone in the center. It firms up as it cools, so patience actually helps here.
Timing Guidelines
- Start with 30–40 seconds
- Check texture
- Add 10-second bursts if needed
What Texture Should You Expect
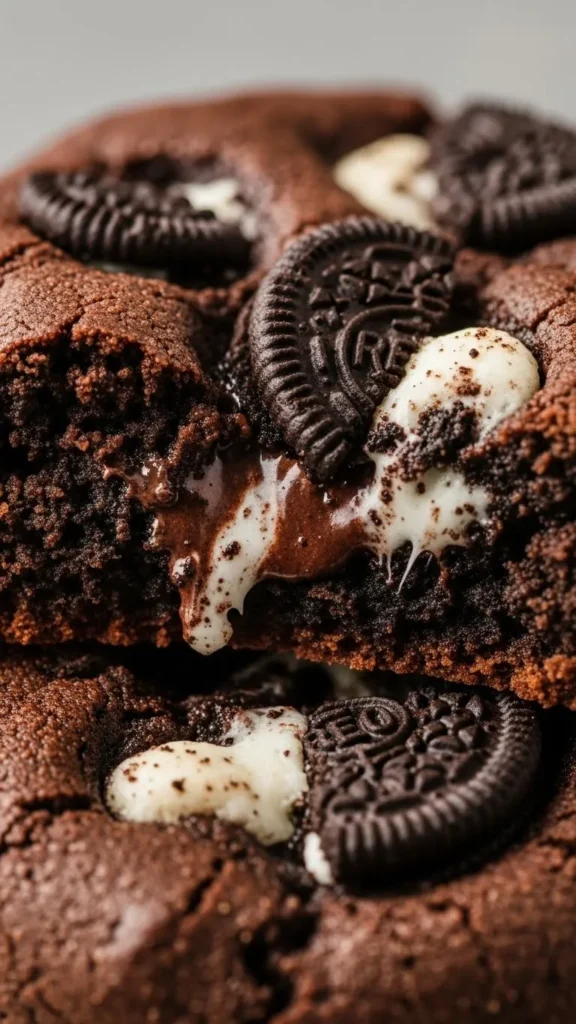
This cookie turns out soft, thick, and slightly fudgy. It won’t crisp, and it doesn’t try to. The center stays tender with Oreo pieces melted just enough to blend. As it cools, the texture settles into something closer to a cookie bar. Eating it warm gives the best experience.
Flavor Breakdown Without the Drama
Chocolate dominates, but it doesn’t overwhelm. Cocoa powder deepens the dough, while Oreos add sweetness and crunch. Vanilla softens everything just enough. The balance feels rich without being cloying. One serving satisfies quickly, which feels rare for desserts like this.
Common Mistakes to Avoid
Small missteps can change the result fast. I’ve learned these lessons the hard way. Overcooking dries it out. Too much flour stiffens the dough. Skipping salt dulls the flavor more than you’d expect.
Mistakes to Watch For
- Cooking longer than one minute
- Packing flour tightly
- Overmixing the dough
- Crushing Oreos too finely
Easy Variations If You Feel Like Experimenting
Once you nail the base recipe, variations feel easy. Small changes shift the whole vibe without extra effort. I rotate add-ins depending on mood and what’s in the pantry. Flexibility keeps this dessert interesting.
Flavor Ideas
- White chocolate chips
- Peanut butter swirl
- Mint Oreos
- Double-stuffed Oreos
- Extra cocoa powder
Making It Feel Like a Real Dessert
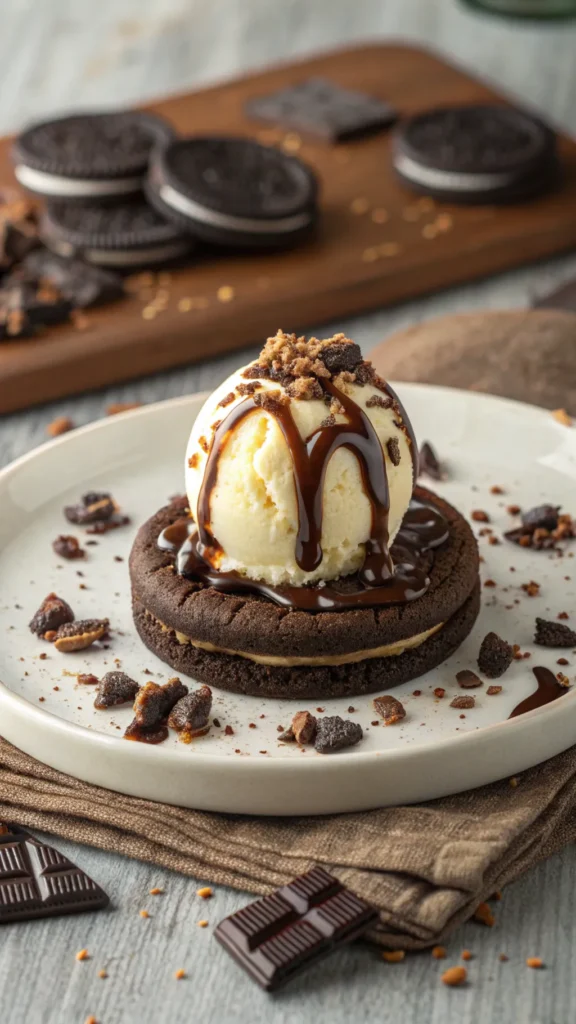
Eating it straight from the mug is completely valid. Still, a simple topping can turn it into a full dessert moment. Minimal effort still counts as effort 🙂
Serving Ideas
- Scoop of vanilla ice cream
- Chocolate syrup drizzle
- Extra crushed Oreos on top
Is a Microwave Oreo Cookie Actually Worth It
This cookie doesn’t replace bakery cookies or homemade batches. It fills a different role entirely. It exists for speed, comfort, and instant gratification. Judged by those standards, it delivers. FYI, I’ve never regretted making one.
Who This Cookie Is Perfect For
This recipe works for Oreo lovers, late-night snackers, and anyone who wants dessert without commitment. It’s ideal for single servings and portion control. No leftovers mean no temptation. If Oreos already hold emotional value for you, this cookie fits right into your routine.
Why This Recipe Feels So Comforting
Oreos trigger nostalgia for a lot of people. They remind us of childhood snacks and simple treats. This cookie taps into that feeling instantly. Sometimes dessert isn’t about creativity. It’s about familiarity and warmth.
Conclusion
The microwave Oreo cookie proves that comfort food doesn’t need time or tools. With a few ingredients and less than a minute, you get something warm, rich, and satisfying. When the craving hits and patience disappears, this recipe shows up and delivers exactly what you want.